7 Tips for Custom Aluminum Window Installation Compatibility

Time:2026-09-17 Author:Isabella
0%

Custom aluminum windows can look precise in a catalog yet fail during installation. A few millimeters of error may leave a sash rubbing, a lock misaligning, or rainwater collecting beneath the sill. This guide explains How to ensure installation compatibility of custom aluminum windows through practical checks before delivery and fitting.

Experienced installers compare the window schedule with the structural opening, wall thickness, flashing design, and drainage path. They also confirm glass weight, frame depth, thermal breaks, hardware clearance, and the manufacturer’s fixing requirements. Site conditions matter. Uneven masonry, old timber framing, and unexpected insulation can change the installation plan quickly.

Building-science expert Joseph Lstiburek often teaches, “If you can’t make it waterproof, make it drainable.” That principle applies directly here. A compatible window needs more than the correct width and height. It needs a reliable transition between frame, sealant, flashing, insulation, and exterior cladding. Small details matter.

This seven-tip overview focuses on those details. It encourages measured drawings, mock-up checks, clear tolerances, and early communication with fabricators. It also recognizes an uncomfortable truth: even a carefully prepared order can expose problems after the wall is opened. That is not failure, but it demands a thoughtful correction rather than a rushed adjustment. Product data, qualified installers, and documented site measurements provide stronger confidence than assumptions. When in doubt, pause before cutting. A short delay is cheaper than replacing a custom frame.
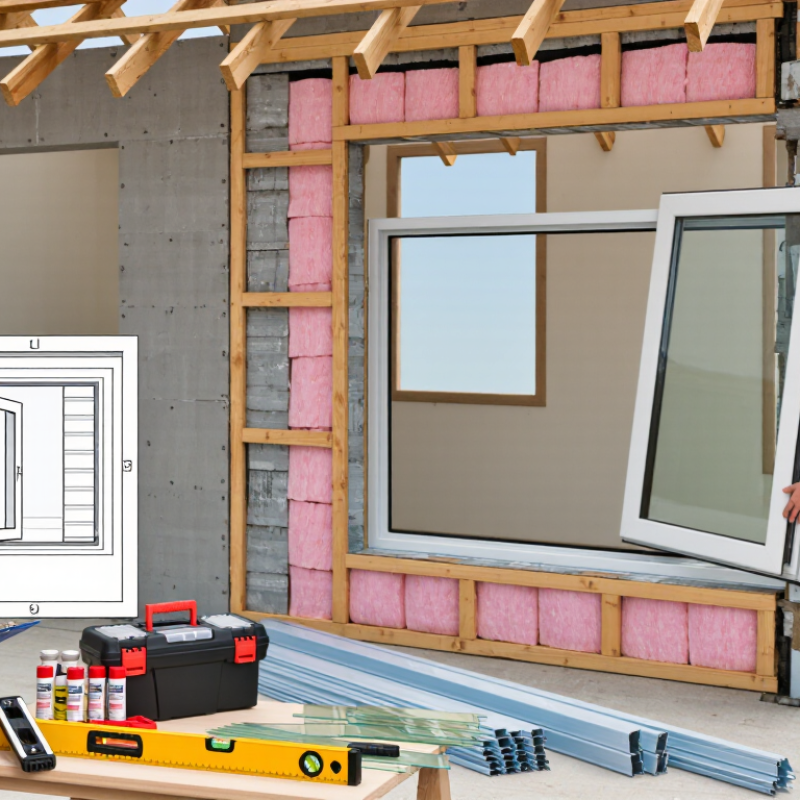
7 Tips for Custom Aluminum Window Installation Compatibility

Define Opening Size, Loads, and Egress Using ASTM E330 Criteria

7 Tips for Custom Aluminum Window Installation Compatibility

Define opening size, loads, and egress before ordering custom aluminum windows. ASTM E330/E330M evaluates resistance to uniform static air pressure, deflection, and permanent deformation. It does not determine the required opening size or emergency egress dimensions. Those decisions require project drawings, site measurements, and applicable building codes.

Measure the rough opening at three points vertically and horizontally. Use the smallest readings, not the average. A 1,440 mm by 1,200 mm opening equals 1.728 square meters. Under an illustrative 1.5 kPa design pressure, the window may resist about 2.6 kN of total force. That figure is not universal. Wind exposure, building height, geometry, glazing weight, and anchor spacing change the result. ASTM testing must reflect the specified assembly, not just a similar frame.

The U.S. Department of Energy reports that windows can account for 25% to 30% of residential heating and cooling energy use. Poor compatibility may increase air leakage and movement at the perimeter. Check shims, fasteners, sill support, and drainage paths before sealing. Egress requires clear opening width, height, and area after the sash operates. A large window may still fail if its hardware blocks the escape path. Small details matter. In practice, installers sometimes trust a clean drawing too much. Rechecking field conditions feels repetitive, but it catches uneven masonry, unexpected loads, and unusable opening clearance.

Select NFRC-Rated U-Factor and SHGC for the Project Climate Zone

7 Tips for Custom Aluminum Window Installation Compatibility

Tip 1: Start with the project’s IECC climate zone, not a preferred glass package. NFRC labels report U-factor and SHGC under standardized conditions. Lower U-factor means better insulation, while SHGC indicates solar heat entering the room. Tip 2: In heating-dominated zones, consider a lower U-factor with moderate SHGC. Winter sun can help warm a south-facing room. Tip 3: In cooling-dominated zones, select a lower SHGC, especially for west-facing windows. Afternoon glare can be severe.

Tip 4: Check the complete NFRC-rated assembly, including glazing, spacer, sash, and aluminum frame. Aluminum conducts heat quickly. A thermal break is essential, but it does not correct poor glass selection. Tip 5: Compare values against local energy-code requirements and project targets. The U.S. Department of Energy reports that windows may account for 25%–30% of residential heating and cooling energy use. Small rating differences can matter across a large façade.

Tip 6: Review orientation, shading, and room use before finalizing SHGC. A shaded bedroom may tolerate a different value than an exposed office. Tip 7: Request the NFRC label and installation details before fabrication. Field gaps can undermine excellent ratings. I have seen drawings specify impressive glass values while ignoring frame joints and perimeter seals. That is an easy mistake. Also, climate-zone guidance is not universal; verify local conditions, because a perfect number on paper may perform poorly beside an unshaded window.

7 Tips for Custom Aluminum Window Installation Compatibility - Select NFRC-Rated U-Factor and SHGC for the Project Climate Zone

Tip Compatibility Dimension Verified Data or Selection Guidance Why It Matters Installation Check
1 Match the NFRC U-Factor to the Climate Zone Use the whole-window NFRC U-factor, measured in Btu/h·ft²·°F. Lower values indicate better resistance to heat flow. Practical starting targets are approximately:
Climate Zones 1–2: ≤ 0.40; Zone 3: ≤ 0.35; Zones 4–8: ≤ 0.30. These are selection targets, not a substitute for current local code requirements.
A suitable U-factor helps limit winter heat loss and improves interior surface temperatures. Confirm the U-factor applies to the complete window assembly, including frame, sash, glazing, and spacers—not glass alone.
2 Select SHGC by Climate and Orientation SHGC is a number from 0 to 1 showing the fraction of incident solar heat admitted through the window. In hot or cooling-dominated locations, a typical starting range is ≤ 0.25–0.30. In heating-dominated locations, south-facing windows may benefit from a moderate-to-higher SHGC of about 0.35–0.45 when glare and overheating are controlled. Lower SHGC reduces unwanted solar heat gain; higher SHGC can provide useful winter solar gain. Review each façade separately. East- and west-facing glazing commonly receives difficult-to-control low-angle sun.
3 Verify Aluminum Frame Thermal Performance Prefer thermally improved aluminum frames with a continuous thermal break where energy performance is important. Evaluate the complete NFRC-rated window rather than relying only on the frame material or glass center-of-pane value. Aluminum conducts heat readily; an effective thermal break reduces conductive heat flow and condensation risk. Check frame depth, thermal-break location, sash clearance, drainage paths, and compatibility with the selected glazing thickness.
4 Confirm Rough Opening and Structural Fit Measure width, height, and sill condition at multiple points. A common installation allowance is approximately 1/2 inch total clearance in each direction, but the window manufacturer's approved installation instructions control the final gap. Correct tolerances allow shimming, leveling, thermal movement, and perimeter sealing without distorting the frame. Do not force a unit into an undersized opening. Verify plumb, level, square, sill bearing, and load-transfer requirements before fastening.
5 Coordinate Water and Air-Sealing Layers Integrate the window with the wall's water-resistive barrier, sill pan or equivalent sill-flashing strategy, jamb flashing, head flashing, and interior air seal. Use compatible sealants and membranes according to their published application limits. A high-performing window can still leak if the rough-opening flashing and perimeter air seal are discontinuous. Install the sill drainage path first, maintain positive drainage to the exterior, and avoid blocking designed weep holes.
6 Match Fasteners to Aluminum and Wall Construction Use corrosion-resistant fasteners and approved anchors sized for the substrate and design loads. Separate incompatible metals where required to reduce galvanic corrosion, and follow the approved maximum spacing and edge-distance requirements. Fastener selection affects structural resistance, frame movement, corrosion durability, and long-term weather tightness. Verify substrate type, fastener embedment, anchor location, frame reinforcement, and perimeter sealant compatibility before drilling.
7 Check Glass, Safety, and Operating Compatibility Confirm glazing thickness, insulating-glass unit dimensions, safety-glazing locations, visible transmittance, condensation resistance, and opening hardware requirements. The selected glass package must fit the frame's approved glazing pocket and weight limits. Glass weight, thermal movement, safety requirements, daylight, and ventilation all influence reliable operation. Verify clearances after shimming and fastening. Test locks, rollers, hinges, drainage, and sash operation before completing interior and exterior finishes.
Technical note: NFRC U-factor and SHGC values should be taken from the current certified product rating for the exact size, frame, spacer, glazing, and configuration being specified. Always verify the applicable building code, wind and water requirements, safety-glazing rules, and installation instructions for the project location.

Verify AAMA/WDMA/CSA A440 Air Leakage at 1.57 psf (75 Pa)

Custom aluminum window compatibility starts with the air-leakage test report. Ask for results measured at 1.57 psf, or 75 Pa, under AAMA/WDMA/CSA A440 requirements. This pressure exposes gaps around sashes, corners, gaskets, and frame joints. Lower leakage generally indicates better resistance, but the project specification still controls acceptance.

Match the tested configuration to your order. Check the same frame depth, sash size, glazing type, hardware, seals, and opening style. A report for a small fixed window may not represent a large sliding unit. Read the tested air-leakage value, test size, pressure, and classification carefully. Do not accept a vague “tested” statement.

Installation changes the result.

Before setting the frame, inspect the rough opening with a level, tape measure, and moisture check. Keep the frame square, support it at approved points, and avoid overtightening fasteners. Seal the perimeter continuously, especially at sill corners and mullion joints. I have seen excellent factory results weakened by compressed shims and interrupted sealant. The mistake is easy to miss.

For field verification, use a qualified tester and record room pressure, weather conditions, window position, and leakage readings. Site conditions rarely match a laboratory. That matters. If the measured leakage seems high, check the operable panel, locking pressure, weatherstripping, and perimeter seal separately. One imperfect installation review can prevent repeated failures across an entire project.

Confirm ASTM E331 Water Resistance Before Interior Finishes Begin

Custom aluminum windows can look precise while still allowing hidden water entry. ASTM E331 evaluates resistance to water penetration under controlled, static air pressure. It does not certify every wall condition. The project specification must define the test pressure, duration, sample size, and acceptance criteria.

Tip 1: Test early. Schedule the ASTM E331 inspection before insulation, drywall, or interior finishes cover the window perimeter. Inspect sill pans, end dams, flashing, gaskets, weep paths, and fastener penetrations. A small gap may remain invisible after finishing.

The U.S. Department of Energy reports that windows can account for 25–30% of residential heating and cooling energy use. Water leakage can worsen comfort, damage insulation, and reduce long-term performance. Tip 2: Test a representative mockup and several installed units. Include corners, transitions, splices, and different elevations. One successful sample is not enough. ASTM International also emphasizes that laboratory testing cannot represent every field installation.

Tip 3: Use an independent, qualified technician and document pressure readings, spray duration, photographs, and corrective work. Do not rely only on a visual check. A recurring site lesson is simple: the frame is rarely the only problem. Interface details usually decide the result. If a repair passes once, question whether the underlying drainage path was actually restored. This extra review may feel slow, but interior repairs cost more.

7 Tips for Custom Aluminum Window Installation Compatibility

Confirm ASTM E331 water resistance before interior finishes begin. The chart shows a common reference test profile of 75 Pa for 15 minutes. Always verify the pressure required by the project specification and tested window assembly.

Installation Compatibility Checklist

  1. Confirm the approved aluminum window size, configuration, glazing, and hardware.
  2. Check that the rough opening dimensions match the manufacturer-approved installation details.
  3. Verify sill pans, flashing, end dams, and drainage paths before the frame is sealed.
  4. Use compatible sealants, backer rods, membranes, fasteners, and finishes.
  5. Confirm the frame is level, plumb, square, and properly anchored.
  6. Complete ASTM E331 water-resistance testing before drywall, insulation, or interior finishes conceal the installation.
  7. Document test pressure, test duration, locations, observations, and corrective work.

Interpretation: During the reference profile, the applied static air pressure remains at 75 Pa for 15 minutes. The assembly should show no uncontrolled water penetration under the applicable project acceptance criteria before interior finishes proceed.

Install to ASTM E2112: Flashing, Shims, Weeps, and Perimeter Seals

7 Tips for Custom Aluminum Window Installation Compatibility

Install to ASTM E2112: Flashing, Shims, Weeps, and Perimeter Seals

Confirm the rough opening before ordering custom aluminum windows. Measure width, height, sill slope, and wall depth twice. Small errors can create large sealing problems. Check the window frame, wall assembly, and flashing materials for compatibility. Dissimilar metals may corrode when moisture remains trapped. Review sealant and membrane instructions before installation.

Install sill flashing with continuous support and positive drainage. Extend it beyond the frame where the wall design requires protection. Set the window level, square, and plumb. Use durable shims at approved structural points, not random gaps. Shims must support the frame without twisting it. Do not block the factory weep paths. Keep them open and visible.

Apply perimeter seals according to ASTM E2112 principles and the project’s wall system. Use backer rod when joint depth requires controlled sealant placement. Seal the sides and head carefully, but preserve drainage at the sill. I have seen excellent windows fail because installers sealed every opening. That mistake is easy to make. It is also avoidable. Leave room for aluminum expansion and contraction. Inspect each corner, fastener, shim, and seal before closing the wall. A final water check may reveal problems that visual inspection misses.

FAQS

What air-leakage pressure should custom aluminum windows be tested at?

Request results measured at 1.57 psf, or 75 Pa, under the applicable window standard. This pressure exposes gaps around sashes, corners, gaskets, and frame joints. Lower leakage usually indicates better resistance. The project specification still controls acceptance.

Why must the tested window configuration match the ordered window?

Compare frame depth, sash size, glazing, hardware, seals, and opening style. A small fixed window may not represent a large sliding unit. Check the test size, pressure, leakage value, and classification. Avoid accepting a vague “tested” statement.

How can installation increase air leakage?

A twisted frame, compressed shim, or interrupted seal can weaken factory performance. Keep the frame square and support it at approved points. Avoid overtightening fasteners. Seal the perimeter continuously, especially around sill corners and mullion joints.

What should be checked before installing the window frame?

Measure the rough opening with a tape measure. Check level, wall depth, sill slope, and moisture. Confirm the opening is square. Measure twice. Small errors can create large sealing problems.

When should water-resistance testing occur?

Test before insulation, drywall, or interior finishes cover the perimeter. Inspect sill pans, end dams, flashing, gaskets, weep paths, and fastener penetrations. A small gap may disappear after finishing. That becomes expensive later.

What does controlled water testing actually prove?

It evaluates resistance under specified pressure, duration, and spray conditions. It does not certify every wall condition. Test representative mockups and several installed units. Include corners, transitions, splices, and different elevations.

How should windows be installed for drainage?

Install sill flashing with continuous support and positive drainage. Keep factory weep paths open and visible. Use durable shims at approved structural points. Do not seal every opening. Water needs a controlled escape route.

What should a field test record?

Record room pressure, weather, window position, spray duration, photographs, and leakage readings. Use a qualified independent tester. If leakage seems high, inspect the operable panel, locks, weatherstripping, and perimeter seal separately. One review may prevent repeated failures.

Can sealing every gap improve water resistance?

Not always. Blocking sill drainage can trap water inside the assembly. Preserve drainage while sealing the sides and head. Allow room for aluminum movement. I might still question a repair that passes only once.

Conclusion

How to ensure installation compatibility of custom aluminum windows begins with accurate project evaluation. Confirm the rough opening dimensions, structural loads, and emergency egress requirements using ASTM E330 performance criteria. Select windows with NFRC-rated U-factor and SHGC values that match the project’s climate zone and energy goals. It is also important to verify that the selected units meet AAMA/WDMA/CSA A440 air-leakage requirements at 1.57 psf (75 Pa), helping maintain comfort and efficiency.

Before interior finishes are installed, test or confirm water resistance in accordance with ASTM E331. During installation, follow ASTM E2112 principles by preparing continuous flashing, setting the window with properly sized shims, keeping drainage paths and weeps clear, and applying compatible perimeter seals. Careful coordination among the designer, installer, and building team ensures that the custom aluminum windows fit the opening, perform as specified, and remain protected from air and water intrusion throughout the building’s service life.

Isabella

Isabella

Isabella is a dedicated marketing professional with a sharp focus on driving brand growth and engagement through strategic content creation. With an extensive background in digital marketing, she combines her passion for storytelling with her keen understanding of industry trends to deliver......